

Artificial Flower Wall
Modular flower wall panels that build a photo backdrop one tile at a time — greenery bases and bloom-faced styles in silk-blend and PE, zip-tie mounted to any frame, grid or pipe-and-drape. Every listing states the panel's measured size and how many cover a standard 8×8 ft. backdrop, so the wall you plan is the wall you build. No rented backdrop, no return shipment after the reception.
Quick answer: Size the wall from its job: a photo-booth backdrop runs 8 × 8 feet — sixteen 24-inch tiles — a sweetheart-table head wall 10–12 feet wide by 8 tall (20–24 tiles), a ceremony backdrop the arch footprint plus two feet per side. Mount on a grid frame or pipe-and-drape, sandbag the stand, and the same panels re-hang at the reception.
The 30-Second Wall Pick
- Coverage math: a standard 8×8 ft. backdrop takes 16 of the 24×24 in. tiles on this page — stated per listing.
- The budget split: greenery base tiles behind, bloom-faced tiles concentrated camera-side — 60/40 reads full for less.
- Mounting: zip ties to a grid frame or pipe-and-drape; every listing notes whether mounting ties are included. A full 8×8 wall runs heavy — sandbag the base of any freestanding stand.
- Price band (as of October 2026, USD): greenery tiles $18–24 each, bloom tiles $28–45, edge tiles $22–30; a full 8×8 wall lands $380–560. Free US shipping over $200.
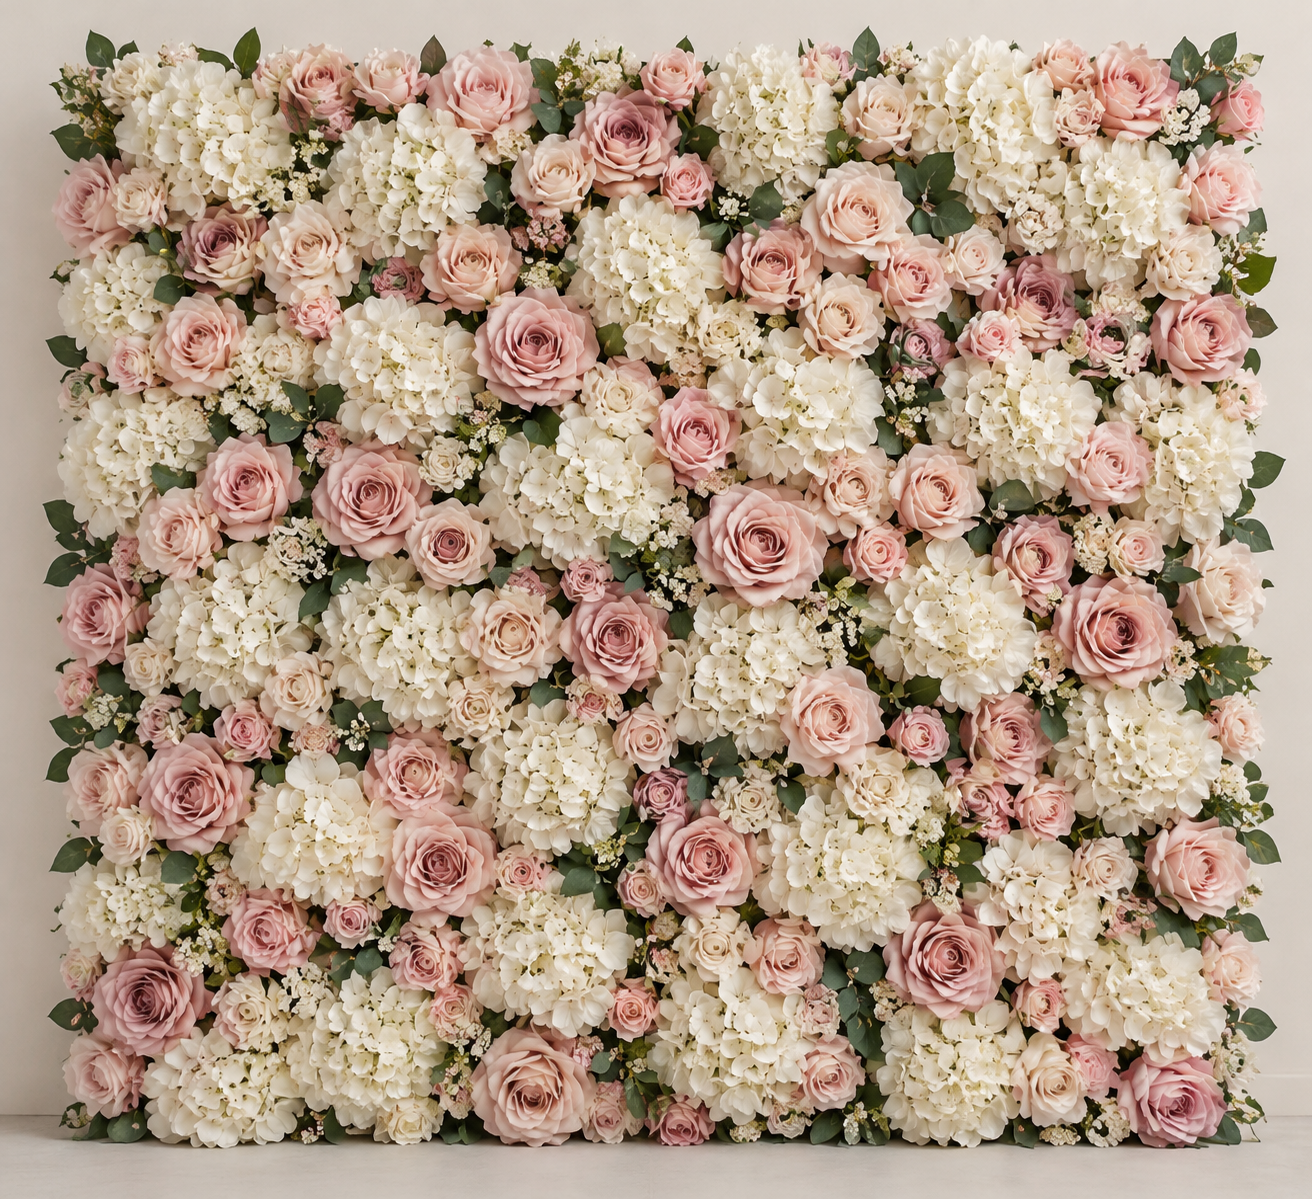
Sizing the Wall From Its Job
Flower walls fail by size more often than by palette — a wall too small for its job reads like a screen pulled aside, and one too large for the venue swallows the room. The three standard jobs and their coverage math:
How to Build a Faux Flower Wall
Five decisions, in the order backdrop-builders make them.
- How big a wall do you actually need?
Size follows the photo plan, not the venue — the table above is the working math. Coverage math per panel is stated on every listing: a 24×24 in. tile covers 4 sq. ft., so an 8×8 backdrop takes 16 tiles, a 10×8 takes 20, a 12×8 takes 24. Buy to the measured target plus 2-4 spare tiles for edges and on-site repairs; the spares are also why partial panels never show at the corners.
- Greenery base, bloom face, or mixed?
The mixed build is the standard: greenery base tiles carry the square footage at $18-24 each, bloom-faced tiles concentrate where the camera sits — behind the couple's shoulders, the center 60% of the wall — at $28-45 each. A 60/40 green-to-bloom split on an 8×8 wall reads full and photographs dense for roughly 30% less than all-bloom. All-bloom walls are the luxury statement and priced accordingly; the listing for each tile states its face density so the split arithmetic is done before checkout.
- What does it mount to?
Grid frames, pipe-and-drape kits, and existing venue backdrops — the three standards (zip-tied to a pipe stand is the rental-industry method, freestanding anywhere; hooked to a venue wall only where the venue permits fasteners). Tiles zip-tie through their backing mesh at the corners and midpoints; a 16-tile wall mounts in 30-45 minutes with two people. Every listing notes whether mounting ties are included, and the frame itself is never included — listings say so plainly. Weight adds up: a full 8-by-8 wall runs heavy enough that the stand, not the panels, is the stability question — sandbag the base of any freestanding build, and dry-fit the stand before the wedding week. The install walkthrough linked on each listing covers the grid-frame and pipe-drape builds tile by tile, because the competitor story of 'scrambling for Plan B' on setup day is exactly what a linked video prevents.
- How do tiles read as one wall?
Through stagger and edge discipline: set tiles in a running bond (offset rows, like brick) rather than a grid so seams don't line up, overlap the face foliage of adjacent tiles by an inch or two as you mount, and finish the outer edge with the edge tiles — that's what they're for. Bloom placement gets one adjustment pass after mounting: rotate tiles so bloom clusters sit at different heights, which is what kills the 'tiled' look in photos. Density does the rest: panels here are built to read solid at camera distance, with no grid showing at the three-to-five-foot range guests and photographers work in — at nose distance the stems and mesh are visible, which is the honest framing for every wall on the market. The stagger-and-rotate pass is in the walkthrough, not in fine print.
- When should the panels arrive?
Wedding orders deliver at least two weeks before the date, buffer built into checkout — walls specifically want the window, because the dry-build is the whole game: stand the frame, mount every tile once in a garage or hall, mark the camera-side, then pack back down in labeled stacks. Setup day becomes re-hanging marked tiles, 15 minutes instead of an hour. The same modularity moves the wall from ceremony to reception: zip-tie mounting comes down in minutes, panels stack flat for the trip across town or down the hall, and re-assembly behind the dessert or head table takes the same two people under an hour — schedule the move during cocktail hour, when the ceremony site is clear and the reception room is being turned. Panels keep indefinitely; a wall built for the wedding re-hangs for the first-anniversary party or resells as a lot.
Rent, Buy or Build — the Three Routes
Local flower-wall rental is strong in major metros and prices a single event below purchase (a rented 8×8 wall runs $250-500 per event plus return shipping, as of October 2026) — but the palette is whatever the rental house owns, delivery windows are their schedule, and the wall leaves with them at midnight. Buying panels costs more once and keeps the asset: wedding walls re-home behind dessert tables at the reception, then birthday parties, product launches and a resale market that is genuinely liquid. Building from loose stems onto blank panels is the third route — the cheapest per panel and by far the most labor — count on a full weekend for a 16-panel wall.
Frequently Asked Questions
How many flower wall panels do I need?
Coverage is stated per panel on every listing: the 24×24 in. tiles on this page cover 4 sq. ft. each, so a standard 8×8 ft. backdrop takes 16 tiles, a 10×8 takes 20, a 12×8 takes 24, and a ceremony backdrop over an arch footprint runs 24-32. Add 2-4 spares for edges, corners and on-site repairs. The math runs in whole tiles at the stated coverage — no panel is sold by vague 'section', and multi-tile listings show the exact count in the photo.
How do you attach flower wall panels to a frame?
Zip ties through the backing mesh: four corners and a midpoint per tile, onto grid frames, pipe-and-drape crossbars, or an existing venue backdrop — zip-tied pipe stands are the rental-industry standard because they stand free anywhere. A 16-tile wall goes up in 30-45 minutes with two people. Whether ties are included is stated per listing; the frame itself never is. Because a full 8×8 wall carries real weight, the stand is the stability question: sandbag the base of any freestanding build and dry-fit it before the wedding week. Each listing links the tile-by-tile install walkthrough; mounting hardware mislisted is a category classic we'd rather prevent than apologize for.
How far in advance should a flower wall order?
At least two weeks before the wedding — the standing delivery policy, buffer built into checkout. Walls want the full window for the dry-build: stand the frame, mount all tiles once before the week-of, mark camera-side tiles, pack down in labeled stacks. The dry-built wall re-hangs in 15 minutes on setup day versus an hour cold; and if a tile arrives off, two weeks is when a replacement still fits the calendar.
Are these walls reusable?
Yes — that's the buy-versus-rent arithmetic: a rented 8×8 flower wall runs $250-500 per event plus return shipping (as of October 2026), and the same wall in panels runs $380-560 once, then re-hangs for the anniversary, the photo booth at the next family event, or resells as a staged lot. Panels store flat in a stack, keep indefinitely, and nothing expires between uses. Moving them venue-to-venue is the same story: mounting comes down in minutes and re-assembly takes two people under an hour. Two uses and the wall is cheaper than renting, and you're never doing a return shipment the Monday after a wedding.
Do flower wall panels have gaps between the blooms?
Density is a spec, not a given — panels here are built to read solid at camera distance, with no grid showing at the three-to-five-foot range guests and photographers work in. Close-up photos on each listing show the density at petal distance so the read can be judged before ordering. At nose distance, individual stems and the panel mesh are visible — walls are camera-distance pieces, and that is the honest framing for the category.
Flower wall or arch — which backdrop?
Different photos: an arch frames the couple from every angle and suits aisle ceremonies; a wall is a flat photo backdrop that owns one direction — sweetheart tables, guest-photo moments, cake and DJ backdrops. Venues with a built-in focal wall want tiles over an arch; outdoor ceremonies almost always want the arch. The two builds also combine: an arch for the vows, a small 8×4 panel run behind the sweetheart table. Arch kits live next door.
Do the panels match the bouquets and decor?
Same order, same batch, same colorway names — the palette rule across the wedding collection. Panels carry the wedding colorways (greenery bases plus bloom faces in burnt orange, dusty blue, blush, sage, ivory), so the wall reads on the same palette as everything carried down the aisle. For a large wall order, the sample box or a single tile in the colorway checked against a fabric swatch in daylight is the recommended first step before the full count.